Reviews
A Review of CapCut Desktop Video Editor: Key Features And Benefits
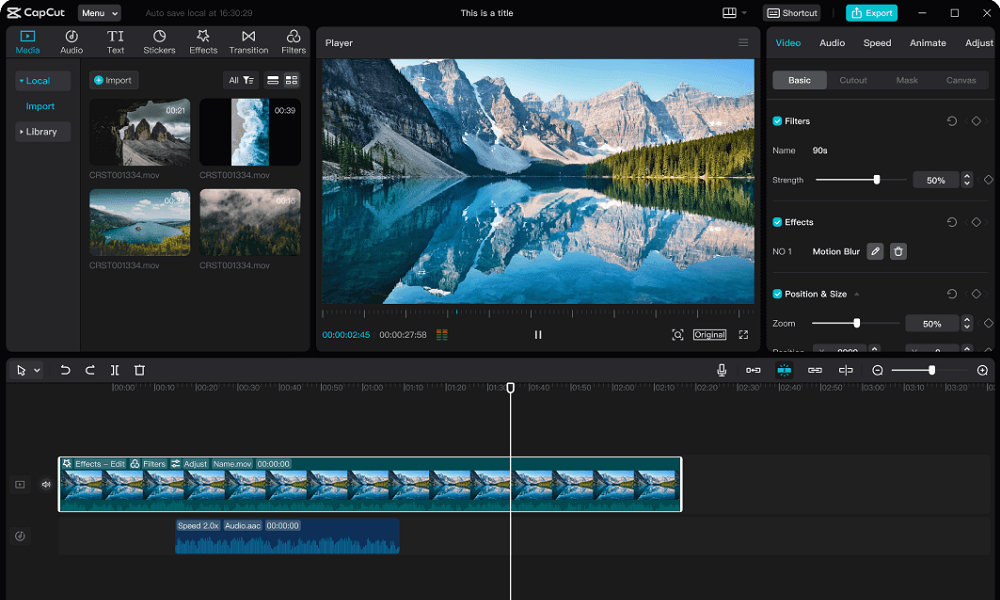
Video creation might feel like a big task, but it can be simple. CapCut Desktop Video Editor makes editing easy for everyone, including teachers and marketers. Nowadays, video content is important for attracting an audience and expressing ideas effectively. CapCut is a free video editing software with amazing features, allowing users to easily make impressive videos.
This blog will examine CapCut’s standout features, such as AI effects and intuitive editing tools. We’ll further review the benefits of CapCut and how it can modernize your content creation tasks. No matter what your skill level is, CapCut can take your video projects to the next level.
Learn how to create exciting videos based on your ideas with CapCut!
Key Features of CapCut Desktop Video Editor
Here’s the breakdown of the key features of CapCut:
- User-Friendly Interface: CapCut provides a clear layout, making it accessible for everyone. Whether you’re just starting or have more experience, it’s a great tool for editing videos.
- Multi-Layer Editing: Users can manage multiple video and audio layers for advanced projects. This opens up the chance for advanced modification and creative solutions.
- Background Removal Feature: CapCut makes it easy for users to remove background from videos and images using AI for fast results.
- Built-in Effects and Transitions: Users can access various effects and transitions. This makes it easy to enhance their videos without downloading additional content.
- Compatibility: It works on Windows and Mac, so many people can use it.
- Free to Use: CapCut offers strong editing tools for free, with no subscription needed.
The next step will highlight basic operational steps, supported by helpful screenshots.
Step-By-Step Navigation of CapCut Desktop Video Editor
1. Importing and Organizing Media
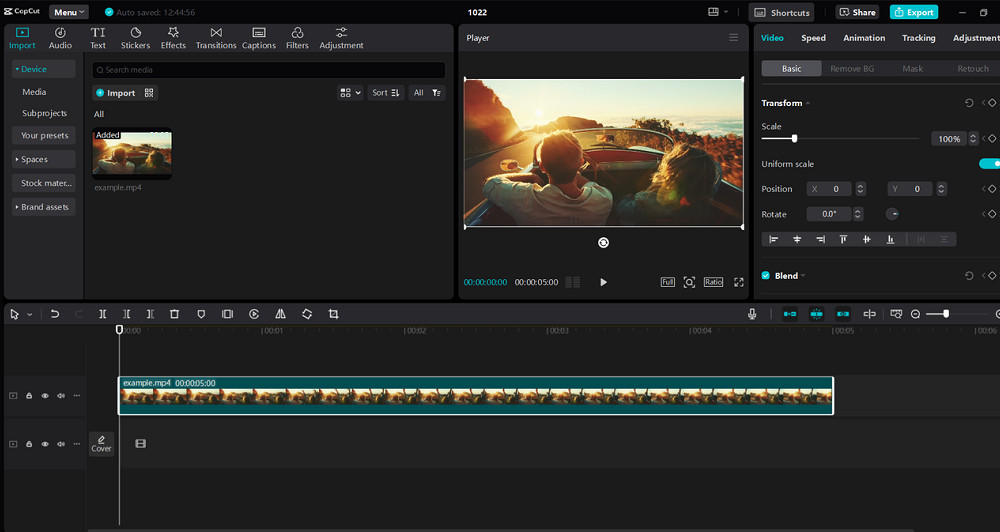
To add media to CapCut, first open the Media tab. You can easily bring in video clips, images, or audio by clicking the import button or dragging and dropping them. This allows for fast file addition to your project. Plus, you can make folders to sort your media, which helps you easily find what you need.
After you import your media, you can arrange it in the media. Just drag your clips from the media pool and drop them onto the timeline. Place the play head at your desired spot to divide a clip and click the “Split” button. Alternatively, you can press the shortcut (CMD/Ctrl+B). Likewise, to merge clips, you only need to drag them together. You can also trim clips by selecting them and changing their edges. This arrangement keeps your project organized and effective.
2. Applying Transitions and Effects
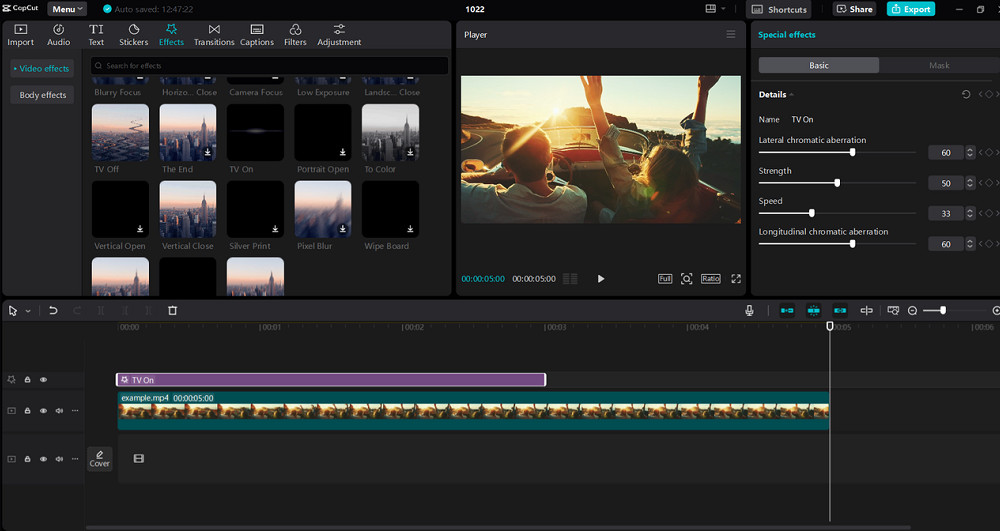
Pick the clip in your timeline to include transitions. Tap on the Transitions option to open the library. The most popular effects include crossfade, which blends clips nicely. Plus, zoom creates exciting movement between scenes.
To use effects, head to the Effects section. You can set filters, adjust the speed, or make slow-motion effects. Drag an effect over your clip and adjust the setting. Use filters in vlogs to boost the atmosphere and modify the speed for exciting scenes. Hence, these tools support refining your video style successfully.
3. Adding Text and Subtitles
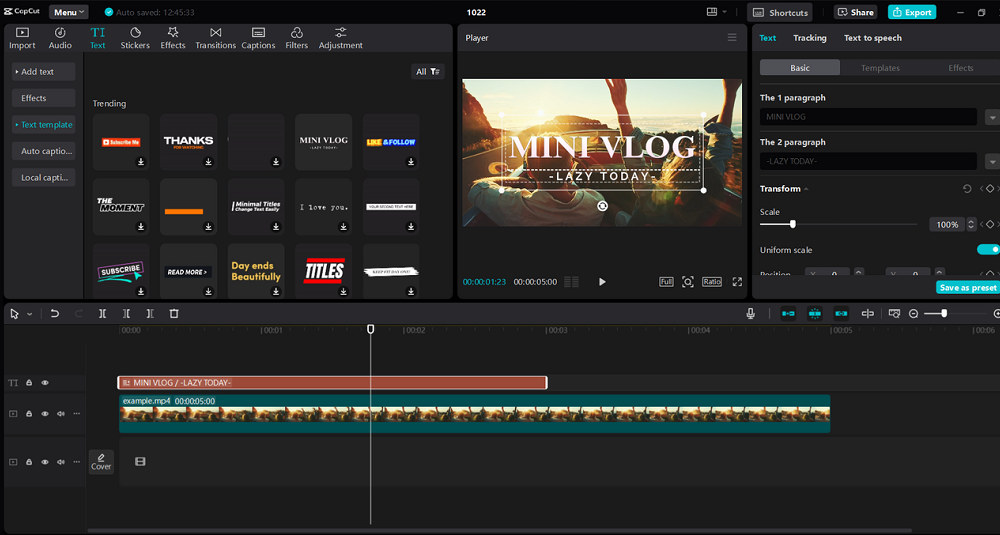
Select the Text option and pick a text box. You can change the text by adjusting the font, size, and colour. Moreover, adding animations is another way to make your text more interesting.
To set the subtitle, open the Subtitle Tool. You can manually insert subtitles or use the auto-generated option. This benefits teachers and content creators who want to connect with global audiences. This guarantees that your videos are easy for viewers in different languages to understand.
4. Audio Editing and Background Music
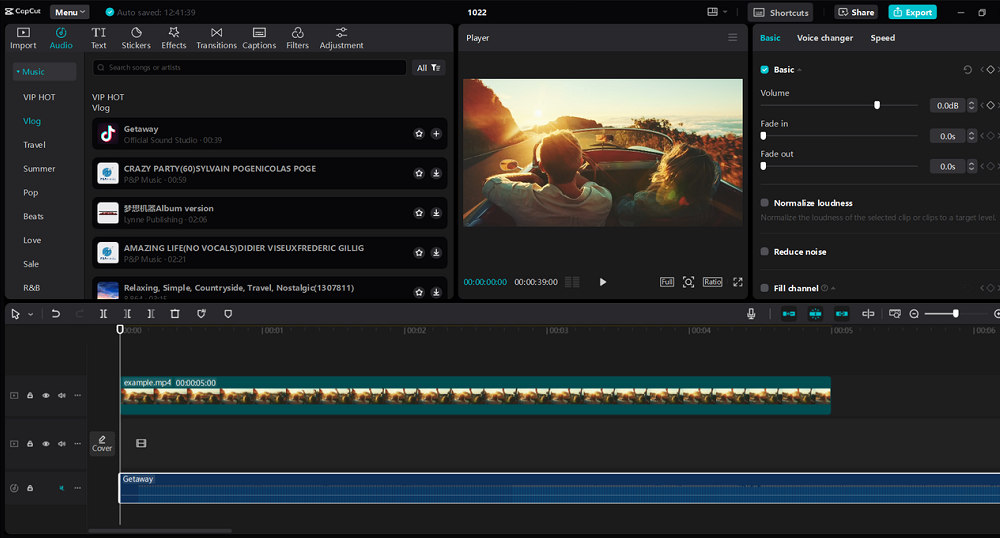
First, import audio files or select from the stock library to add background music. Move your selected audio into the timeline, appearing beneath your video track. Plus, you can find different sound effects in CapCut to improve your project.
In contrast, adjusting sound levels is easy. Click on the audio track to access volume adjustments, and use fade-in and fade-out for smooth transitions. Syncing sound with video clips produces a neat final version. With these features, you can create videos that have professional sound design. This makes your content more pleasant and interesting to view.
5. Exporting and Sharing Your Video
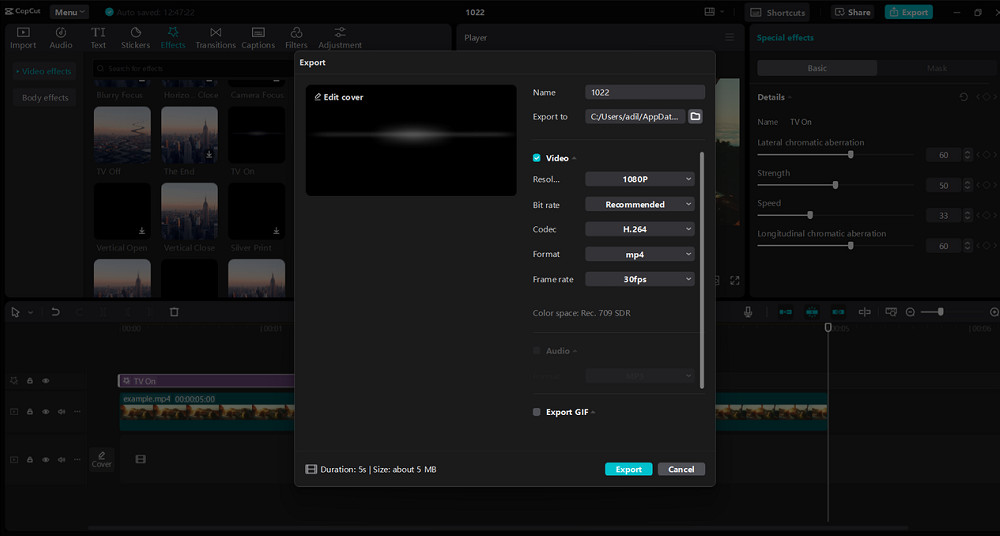
To save your video in CapCut, tap the Export button in the upper right corner. You can select the resolution, such as 1080p or 4K. You can also choose the file format, which is often MP4, for better compatibility. Better quality comes with higher resolutions, which means bigger file sizes.
Moreover, CapCut makes it easy to share your content on YouTube, TikTok, and Instagram. Once the export is complete, pick your favorite platform from the sharing list. This integration makes the process easier, helping content creators save time. Instead of going through the steps of downloading and uploading, you can instantly share your video with a few clicks.
Personal Experience and Benefits of Using CapCut
I’ve had a great time using CapCut for multiple projects. CapCut has changed how I create videos for teaching, YouTube, or advertising. Its automatic captions help save time and make videos easier to access. The effects library has many options to improve visuals easily. I appreciate the ability to create videos without a watermark, which helps me make professional content for free.
In addition, with the text-to-voice option, narration becomes simple. Removing the background helps keep attention focused on the main subjects. In short, CapCut makes editing easy, allowing me to create interesting content promptly and well.
Wrapping Up
Creating professional videos is easy with CapCut, which has a user-friendly layout and strong features. Many tools for users, such as advanced audio editing, effects, and templates, help make video creation easy. CapCut Desktop improves editing by making workflows smoother and offering advanced tools.
We invite everyone to download CapCut Desktop and discover what it can do. Reveal your creative side by editing videos with this handy tool today.

-

 Legal6 days ago
Michigan man JD Vance sentenced to 2 years for threatening Trump and JD Vance
-

 Politics1 week ago
U.S. to designate Maduro-linked Cartel de los Soles as terrorist organization
-

 Health7 days ago
Cambodia reports fatal H5N1 bird flu case in 22-year-old man
-

 World4 days ago
Hurricane Melissa registered 252 mph wind gust, breaking global record
-

 Legal4 days ago
Woman in critical condition after being set on fire on Chicago train
-

 Politics7 days ago
Epstein survivors release PSA calling on Congress to release all files
-

 Legal4 days ago
1 dead, 2 injured in shooting at Dallas Walmart parking lot
-

 Legal3 days ago
Suspect in San Diego stabbing shot by authorities after fleeing into Mexico


